Tuesday, March 24, 2015

An update! And about damn time too.

So, an update!

I've been away on business trips, and then a 4-week holiday, and then back, but lacked motivation to much of anything. Now that's all done, here's a little update...

But first of all, some better pictures of my horse artillery!


I think these pictures do the painting more justice, as opposed to the previous shots.

So at the moment, I'm currently working on two projects:

1. Finalization of my French army for Napoleonics - notably the Elite Infantry Brigade (Lasalle Rules). I finished my elite light infantry earlier, so now I'm in the process of doing the Elite Line infantry, specifically the 57e Regiment d'Infanterie de Ligne. One battalion finished, one more to go.

And then maybe an optional Young Guard cavalry regiment (Eclaireurs) just for shits and giggles.

And then finish off my Austrian army. Nnnnnngh so much to do.


Also painting up some Gemans for a Nachtjager list. These guys are awesome! As you can (maybe) notice, I'm trying to get the two types of splinter camo all painted. I love how these guys are turning out so far, and once I add them to the ruined urban bases, they'll be fantastic!


I think they came out a little blurry :(

Sunday, March 8, 2015

New photo set up

I've been struggling ever since starting this blog to take decent photos of my miniatures. This is in part due to using my i-phone and in part due to not knowing the first thing about photography! Last week I read an article that explained how to get the best out of taking photos with your i-phone. The article is by Garfly on Tale of Painters and is well worth a read as I am not going to even attempt to explain how he does what he does. If you wish to have a read follow the link below...

http://taleofpainters.blogspot.de/2015/02/tutorial-how-to-photograph-miniatures.html

Instead I am going to show you the results I got with my first effort at following his advice. Below are a couple of shots of my (quick and easy) set up.


The big difference is the use of a tripod (cost me £2) and the use of the camera+ app (cost £2.99).  The results are below.

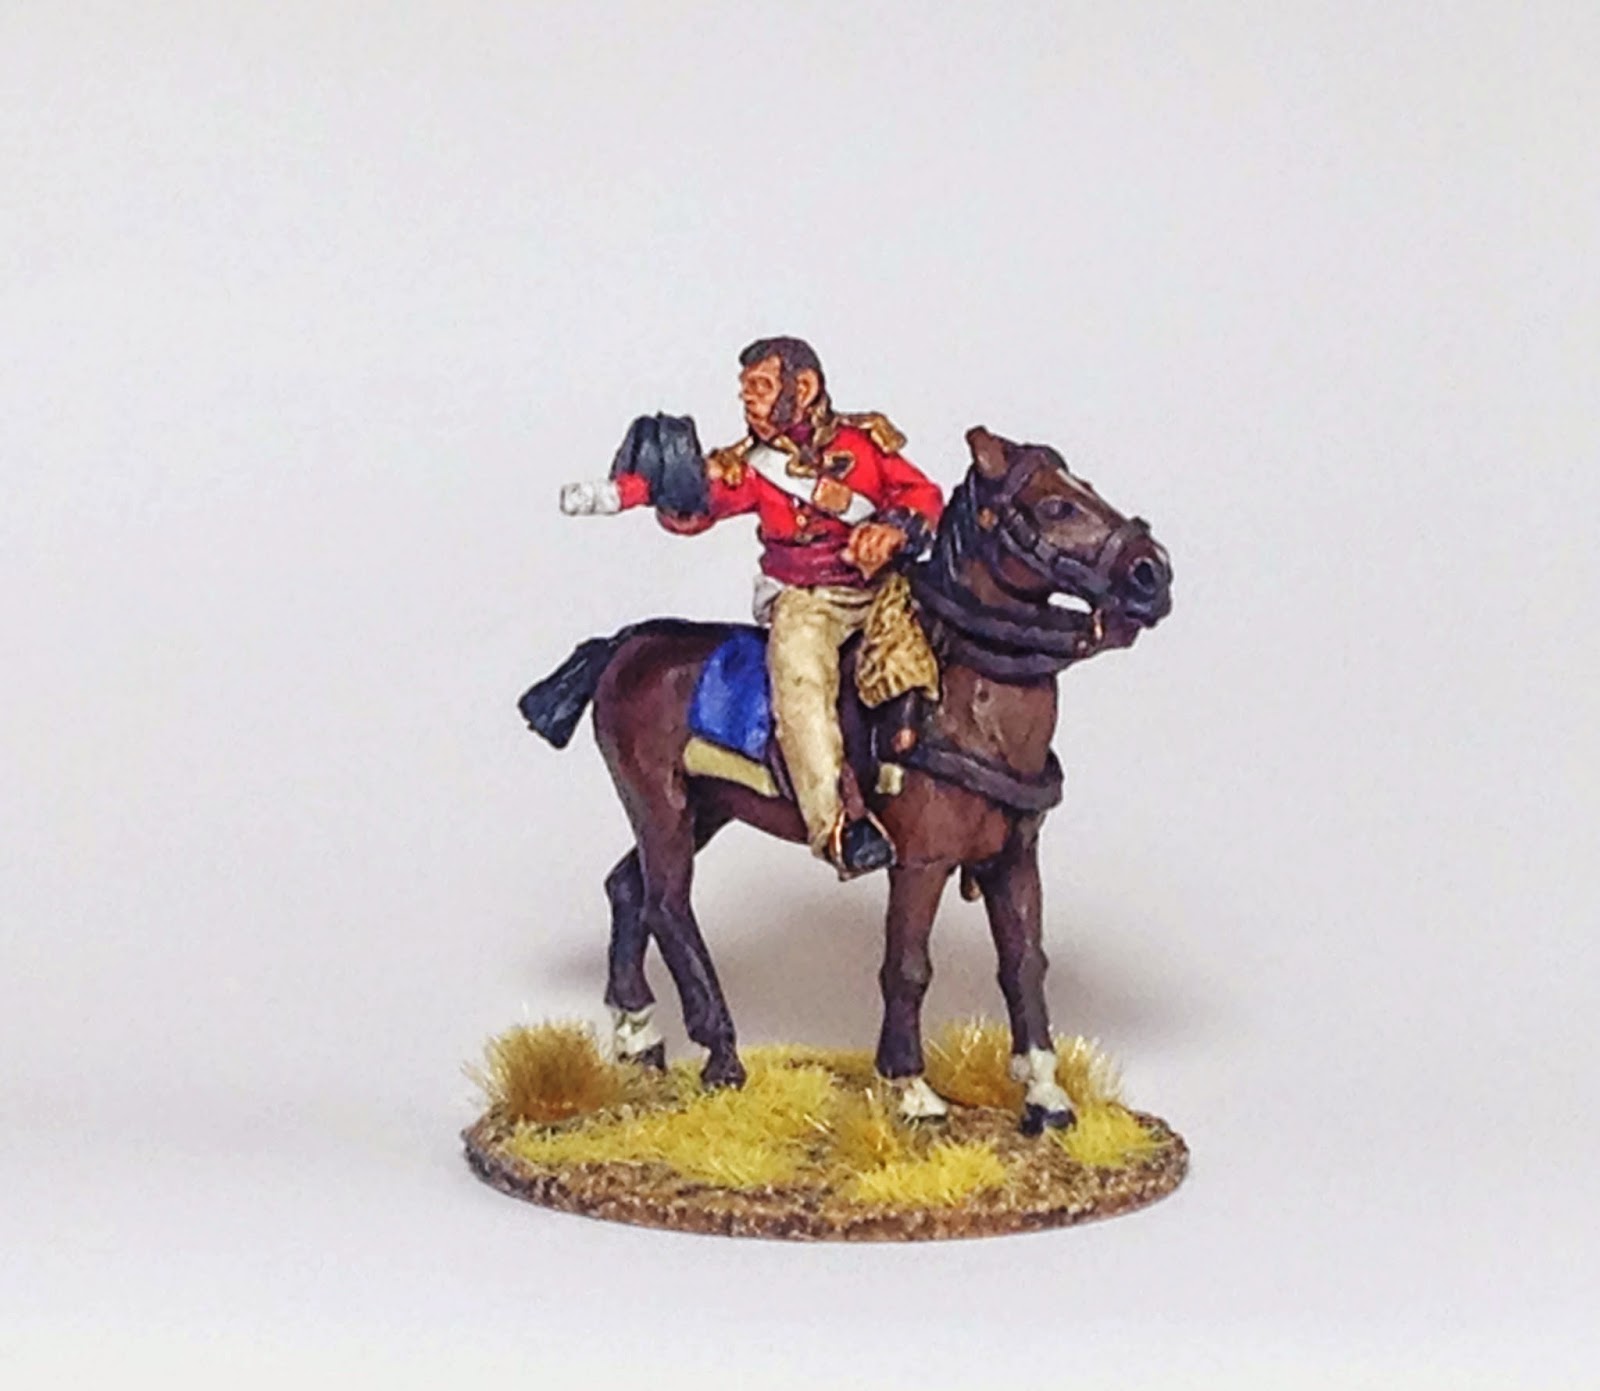
With these first two shots of my British Colonel the model appears much darker than it is in real life. Notice the colour of the background, far from white and more of an off grey.


The same shots taken using Camera+ and following Garfly's advice. The background is still not white but far lighter than the first two. More importantly the colours of the actual model are a much closer match to those in real life. Unfortunately the image is slightly out of focus and this is something that I will have to work on. By letting more light into the camera the image loses some of its sharpness but a little more practise and I should be able to get the best of both worlds.


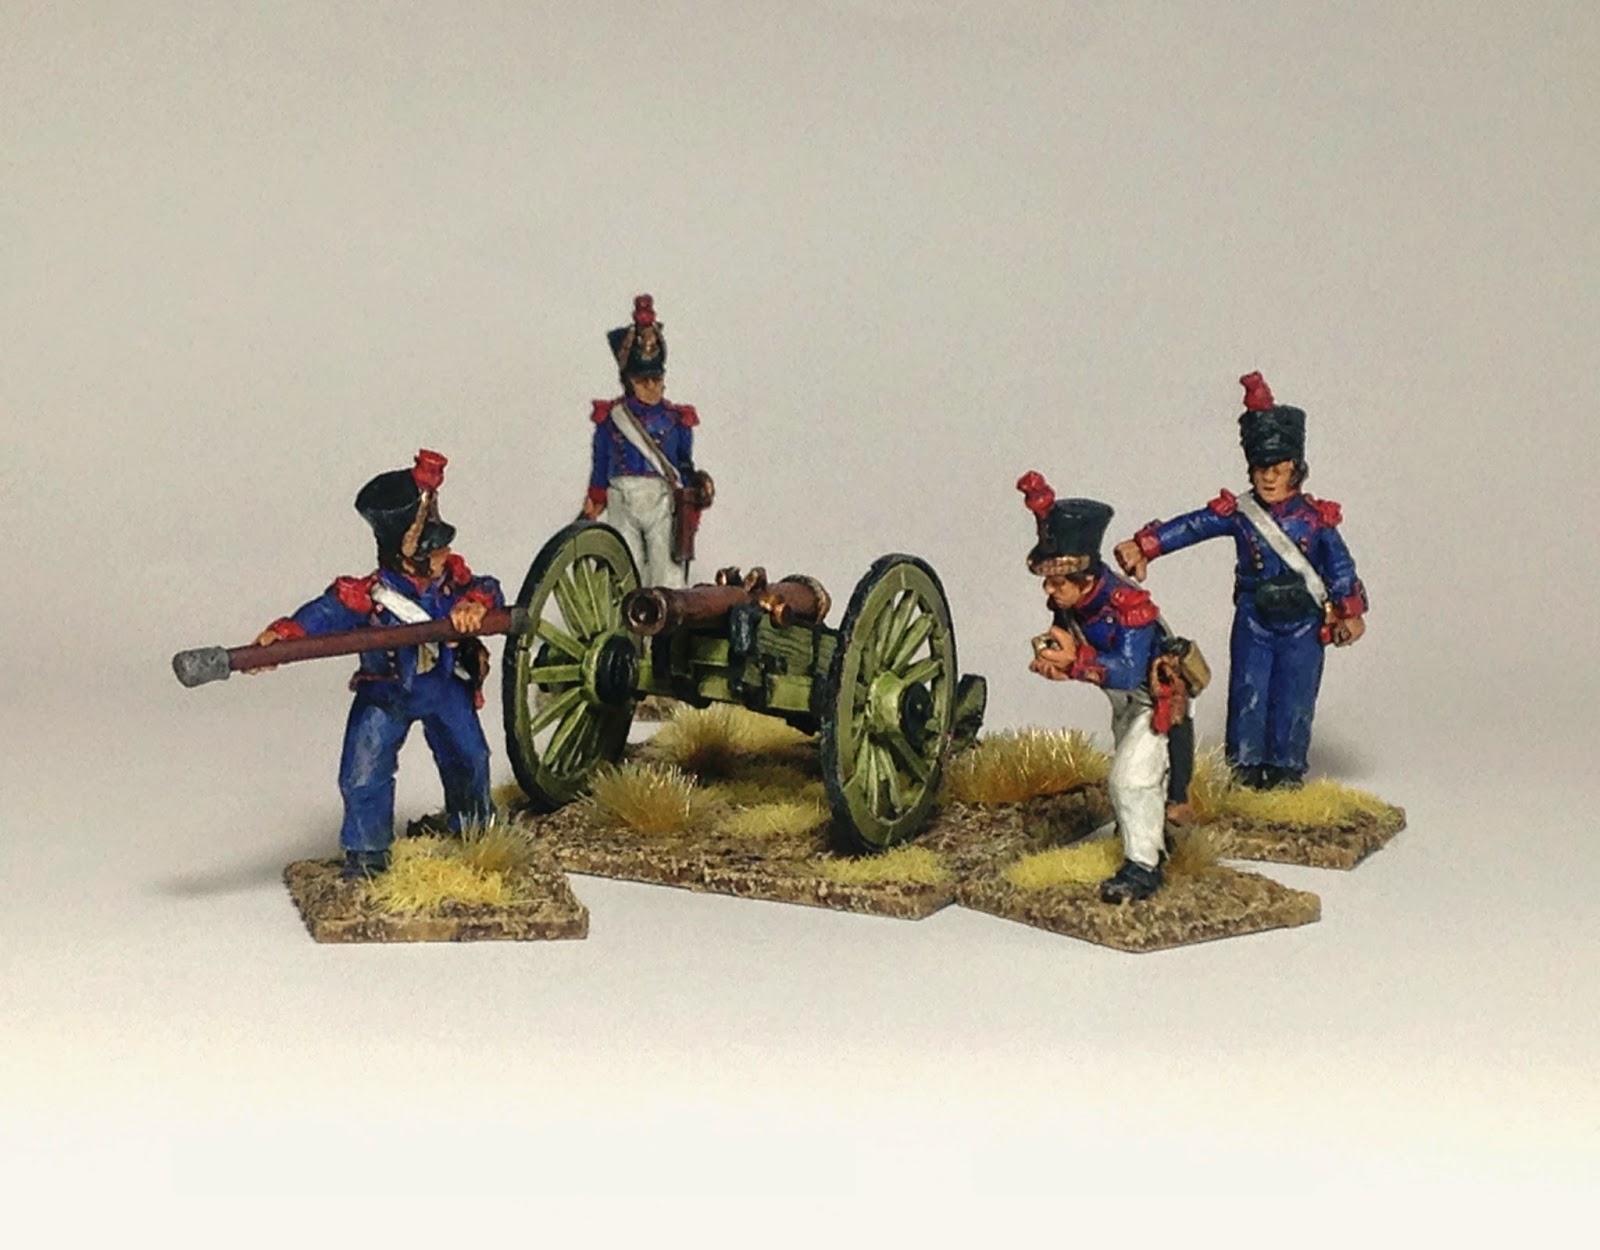
Here are two shots of my French Foot Artillery. I found these very difficult to photograph as each team comprises of five models and getting them all in the right light was very difficult. In the end I had to settle for some very odd angled shots.


With my new set up the models themselves are far more accurate in terms of their colours. You will notice that in the second shot the background has not really been overexposed but importantly the figures themselves appear brighter.


Overall there is a lot more work to be done if I want the photos to represent what I see when I pick one of my models up but this is a good start. It is a shame that people put so much effort into painting their models and yet the internet is full of photos that make that paint job look second rate. While my first attempts above may not be there yet, Garfly's post will show you just what is possible using an i-phone and a cheap app.

Finally I'll leave you with a work in progress shot of the 1/45th Foot. This is the first half of the battalion. They may well take a little while to finish but I think the results will be worth it in the end.


Tuesday, March 3, 2015

Introducing Major-General Henry MacKinnon


Major-General Henry MacKinnon commanded the 1st Brigade of the 3rd Division of the British army in the Peninsular. Under his command were the 45th (Nottinghamshire), the 88th (Connaught Rangers), the 74th (Highland) regiments of foot and three companies of the 5/60th Royal American Rifles.

I am basing my army on Picton's 3rd Division at the battle of Fuentes de Onoro in 1811. At the time Colonel Henry MacKinnon, of the Coldstream Guards, was in command of the 1st Brigade so I have painted him up as a Colonel. I am aware that there are some issues with his uniform (the shako in particular) but I am limited to metal models as these are for my old man and he hates plastic! 

MacKinnon gained a promotion to Major-General soon afterwards but was killed leading the 3rd Division during the attack on The Great Breach at Cuidad Rodrigo on the 19th January 1812. His body was recovered by members of his old regiment the Coldstream Guards and buried at the village of Espeja nearby. 

Overall I am happy with the result and he looks great alongside my redcoats. This was my first time painting a 28mm horse (hard to imagine since I have been painting for years)! I used my airbrush to get the main coat on and then blended in a darker tone for the horse's legs. It is hard to see this effect in the photos but they came out really well.


Interestingly before the Napoleonic Wars MacKinnon's father resided in Dauphiny where a young Napoleon was a frequent visitor. Apparently MacKinnon had a cordial acquaintance with his future enemy!


Friday, February 20, 2015

Hobby Update


I've been hammered at work the last few weeks which resulted in no painting at all for a while there. Thankfully I'm now on holiday so have been catching up on several of my projects...

With my two brothers coming up to stay the first thing that I did was head to the local hardware store and buy a 4x4 section of wood to use as a tabletop. I then put together the Industrial Terrain set from War Games Tournaments. The results are below. Altogether I am very happy with the set and can't wait to paint it up and add some more details to the table.


I also managed to get some gaming in! I took on my brother's fledgling Tyranid army with my Orks. We played two games (my first of 7th edition). We rolled up Relic the first time which led to an Ork victory, just. Most of my force was pummeled by the Nid Monstrous Creatures in a drawn out combat but my sneaky grots managed to get away with the relic and claim victory!

The second game we rolled up was Crusade which sets the sides up to capture D3+3 objectives. We rolled up 5 objectives. The Nids attacked piecemeal and were smashed by the Orks wiping them out to the last bug. I really enjoyed playing and we didn't find it difficult to get going only turning to the rulebook every now and again. Next time I doubt we will even need to do this. I do really like how the separate Psychic Phase now works despite being on the sharp end of it! Playing Orks also helps in terms of enjoyment. Unfortunately I did not get any photos but I will get some up soon.

The table was primarily put together to play some Necromunda on. Whilst we didn't get to play we did manage to put together the majority of our gangs in readiness for future battles. My Scavvies are all glued and ready for painting now.

Gang Leader (courtesy of Forge World)

 Scavvies

 Plague Zombie Followers

My two favourite models are my two conversions. The first is my Scaly which was relatively straight-forward. An Ork Nob's body and arms with a cut-down Kroot's head and a little green stuff. I have so many models to paint up that I am treating these guys firmly as playing pieces as the whole point of getting into Necromunda was to play some games.

Scaly

The second conversion is my favourite and was a bit more involved. I call this guy 'The Butcher' and I think that if i really enjoy Necromunda he will eventually lead his own (extensively converted) gang to war.

'The Butcher'

Finally I finished up my two French artillery guns. The iron on the limbers took much longer than I anticipated but I am once again happy with the result. I went for a sun damaged green and if you look closely both guns feature wear and tear. Finally I used weathering powders to recreate the soot on the barrels. The photos don't really do these guys justice. I'll have to have a look at my photograph set up and see if I can improve things for the future.


Monday, January 12, 2015

French Horse Artillery Battery


I totally stole this idea from the Pendraken forums, more specifically this thread (http://www.pendrakenforum.co.uk/index.php/topic,10452.30.html) where the horse artillery on the base as a little vignette so I did the same!

Okay, these aren't the best of all pictures as I took them fairly rapidly before leaving on my two week course, but they do show off what I wanted to do - a small diorama.

Now compared to my previous artillery bases (smaller 20x30mm per gun), I went 40x40mm in size. Granted, compared to my foot artillery battery they take up more space, but if you include the eventual limbers for foot artillery, they should be roughly equal size. Either way, I think I don't really care that much regarding size as the look is more important. If I'm penalized in-game because the dimensions makes it a larger target, then so be it.

With Flash

No Flash

The little vignette I find gives it the obvious "Horse Artillery!!11111" feel that I'm looking for, and gives it a certain character, as opposed to just the guns with crew that unless you squint and look close enough, appear the exact same as my Foot Artillery battery.

These models are entirely pendraken, except the guns (from Magister Militum, though dimension wise are exactly the same as Pendrakens). No reason why I couldn't use the guns from Pendraken, but I had ordered a pack of MM artillery with limbers, and once again decided that I just dont like the proportions of their cavalry and figures. The gun figures and dimensions were pretty close to Pendraken's, and also had a Howitzer, so I used that along with the Pendraken limbers and Horse Artillery crew I had.

I'll be using the Pendraken artillery for my Divisional Foot Artillery Battery that will be part of my Elite Infantry Brigade - and thus completing the artillery batteries for my 3 brigades.

Sunday, January 11, 2015

WIP French Foot Artillery

 A quick update on my French guns...

The crew have now been based and await varnish and then flocking. I should be able to get them finished this week.
 First Gun Crew

 Second Gun Crew

I'm a bit happier with these photos (the previous ones made them look super shiny). Again I have gone for the campaign look. Although they seem to have taken forever they didn't really take very long to actually paint. Being so busy has meant I've only been able to spare the odd 30mins here and there.

One of the major dilemmas I have had was how to base them. Originally I was going to to for all the crew and gun on a large base but I binned that idea for a couple of reasons.
  1. I wanted to be able to place the figures in an infantry square if the need arises in games.
  2. I will be modelling a full limber team to hitch them up to when being transported and having the crew on the base facing the wrong way would look off.
I decided therefore for the flexibility offered by basing both crew and gun individually. The next issue I had was how to attach the gun so that it could be deployed both ready to fire and then hitched up to the limber. My solution: not to glue the gun in place. In order to hold the gun to the base during play I sculpted some ruts under the wheels. Hopefully these look like the gun has been digging into the ground when it recoils.

 The finished ruts.
 With the guns deployed.
Painted in my dusty peninsula colours and awaiting flocking.


All that is left to do now are the two guns which should be pretty straight-forward and then the flocking. Photos of the finished models coming soon!

Sunday, January 4, 2015

Work in Progress and bases...

I have just completed the French gunners with the exception of the layer of dust I add on when I paint the bases (it is the peninsular after all). Below  are a few shots of the gunners. My apologies for the rubbish photos, I took them quickly on my phone to give you an idea of how I go about basing them. They are not glossy in real life and the colours look nothing like those in the photos! I'll make sure that the final photos post basing are of better quality!


All the miniatures come on a small base as you can see in the photos above. These are a pain if you wish to stick them on proper bases as they stand a good 2mm high. The green stuff in the images is slapped on to hide the sudden jump in elevation. With the texture paint on top of this the models hardly even look like they are on uneven ground.

GW get around having their miniatures appear stood on top of a tuft of grass with their slotta-bases. My problem with these is that the whole model then appears to be on a plinth. Great for display pieces but unconvincing on the gaming table. I've got around this by basing the first few models of my Scavvy gang on 25mm round bases by Renedra. They make brilliant and simple bases of all sizes and are well worth looking at.

Comparison shot of the Renedra base against the traditional GW one.

As you can see I have gone for the plastic Chaos Cultists to represent my regular Scavvies. They are armed with an assortment of Autoguns and Autopistols with a variety of close combat weapons. 


I've picked up two boxes to form the core of my gang. The models are nice so I plan on painting up the first five with only minor changes before converting the second five more substantially.

More updates to follow shortly...